Showing posts with label Christmas Decorations. Show all posts

Sunday, December 1, 2013

Deco Mesh Christmas Wreath


I have decided (yet again) to make another deco mesh wreath for the upcoming Christmas season.  For this project I started with a standard work wreath "pencil frame" which I ordered from www.trendytree.com.  The reason I opted for this wreath frame is because it comes with ties which are already attached to the wreath frame.

1)   I'm sure you can tell fro the picture below, I straightened out all of the ties on the wreath frame before I began working on the wreath.


2)  Start by using a 21 inch 10 yd. roll of deco mesh and gather the WIDTH of the roll together in your hand like the picture below.


3) Secure the gathered mesh down to the wreath frame by using a tie to tie down the mesh.  It doesn't matter weather you start with the TOP outer loop of the wreath frame or the BOTTOM.  The important thing is to just pick either top or bottom to begin with and continue tying down your deco-mesh until ALL of your ties (top or bottom) whichever you began with have been tied up with the deco mesh.


4) The next most important thing is that between EACH tie down you need the SAME AMOUNT of deco mesh.  I used a yard stick and measured 14 inches between EACH and EVERY tie down.  This method helps ensure even, consistent 'poofs' which you will want for your wreath.  If you prefer a smaller wreath you may want to measure out a SMALLER amount, or if you prefer a LARGER wreath, measure 14 inches or more…. just remember, no matter what size you choose to go with… make the measurements between each tie down the SAME for a consistent and even look.


5)  Once you have finished securing the deco mesh to the wreath frame you may see your results and feel a bit disappointed… however, DON'T be! … making a deco mesh wreath is a PROCESS that you have to stick with until you are finished.  the picture below shows a good 'rough draft' of what my wreath looked like once I was finished tying down all of the deco mesh.


6)  The next step was to choose other deco mesh, ribbons, bows, etc… to embellish the wreath.  I chose a 6 inch roll of deco mesh.  I started by tying down this deco mesh beginning with the same tie I used with the red deco mesh.  …. All you need to do is just untwist it a bit and then tie in your 6 inch roll of deco mesh.  Measure the same amount as before  --- 14 inches and work your way around the wreath tying in the 6 inch decorative mesh.


7) Ok, so…. here we are once I've finished tying in the 6 inch roll of decorative mesh around the wreath.  I still plan to add a few more embellishments to the wreath.


8)  The next step is to add the ribbon I chose for the wreath.  Again, I measured out the same amount as deco mesh and decorative deco mesh (14 inches) and cut numerous pieces of ribbon in that length.


9)  Because I knew I wanted to chevron the ends of my ribbon… I folded it in half like the picture below.


10)  Using a pair or scissors I cut each end at an angle in order to make the 'chevron pattern' for the ends of each ribbon.


11)  This is the second ribbon I opted to use for the wreath.  I measured out numerous pieces of ribbon (each 14 inches of length like the mesh).  I folded the ribbons in half and using a pair of scissors I cut each end at an able to 'chevron' the ends.


12)  I secured the ribbons to the same ties I used to secure the deco mesh, just untying and then tying the ribbons back into the wreath.  The picture below shows what the results were.


13)  Afterwards, I adjusted the ribbons, mesh, and other decorations to try and 'even out' the decorations on the wreath…. although I'm pretty sure there isn't much difference between the wreath below and the one above.


In the picture below I opted to add various other embellishments although I'm not sure you can see them too well.  The picture just isn't justice compared to the actual wreath …. if you look close you can see various other embellishments which I fastened down to the wreath frame.


Thursday, November 28, 2013

Candy Cane Deco Mesh Wreath


If you prefer the wreath without all of the embellishments you can leave it plain like the picture below or maybe just add a bow for a pop of color.


I have seen tons of deco mesh wreaths… which, by the way, I LOVE to see!  It's just something about it! It's durable, pretty, stylish and looks good either indoors or outdoors!  At any rate, I found myself drawn to making one of those candy cane deco-mesh wreaths.  If you've ever wondered how to make one of those candy cane deco mesh wreaths you're not exactly alone!  I've been trying to figure that out for quite some time now! lol..

  Well…. the results… I have to say... this was WAY easier than making a traditional deco-mesh wreath!!  And it looks great for the holiday season!.

Supplies:

1- candy cane wreath form (I ordered mine on-line from www.trendytree.com)
1- 21" inch 10yd. roll of deco mesh of your choice (for this project… I chose the red\white stripe)  Also… you can get this at www.trendytree.com as well.
Various decorations, ribbons, etc… that you would like to use as embellishments for your wreath


Gather the ends of your deco-mesh together like the picture above.


Fold the end upon itself like the picture above so you done have the frayed ends sticking out at the bottom of your deco mesh wreath.


 Tie the folded end of your deco-mesh down to the lower right corner of the wreath frame.
Once you have the lower right end tied down…. move up to the next tie down ON THE SAME SIDE… I used about a 9 inch length of deco mesh before I decided my "poof" was big enough to make  it look full.


After you have tied your deco-mesh down to the right side of the frame… you will need to bend the deco-mesh back down to the left tie down (the first tie down on the lower left bottom) on the wreath frame.

Continue from the left tie-down and move the deco-mesh back to the right side tie-down (keeping your 9 inches of length the same between each tie) and use it to tie down/secure the deco mesh to the right side.  Work you way from left to right following this fashion.


Once you finish securing all of the deco-mesh it may look something like the picture above (or most likely it will look way better!, lol)…. at any rate, you can see some of the tie downs are still obviously visible from the front.  You will need to take them and twist them around towards the back of the wreath frame.


This picture shows a view from the back AFTER all of the ties have been twisted around towards the back of the wreath.


This is another view from the front with most of the ties hidden behind the wreath frame.  At his point, you can add embellishments, bows, ribbons and other decorations to your wreath.  I hope this was helpful!!


Monday, November 11, 2013

Deco-Mesh Christmas Tree


This craft project was quite a labor of love from my neighbor!  She spent a good bit of time trying to figure out exactly HOW you can make a Christmas Tree using deco-mesh.


You start with a tomato cage and a set of Christmas lights.  Beverly used standard Christmas lights but I suppose if you are in the mood to get really creative you can experiment with the lights you want to use.


You start with a tomato cage that has a tapered end like the one in this picture.

You will want to "flip it over" so the top rounded portion is now the bottom.

Afterwards, take a strand your Christmas lights and create 3 more columns, tying them to the circles with pipe cleaners…
So, there should be 3 circles, and 6 columns when you add the Christmas lights.


This picture shows the strand of Christmas lights INSIDE the tomato cage and how you can use pipe-cleaners to attach the lights to the tomato cage.


You can tell from these pictures that the light strands are being used as a column to attach the deco-mesh to with pipe cleaners.  Also, … the tomato cage has been painted red to match the deco-mesh.. you can see 'bits and pieces' of the red tomato cage in the pictures as well.


This picture shows how the deco-mesh is gathered and secured to the column with pipe cleaners.  If you need more information on how to 'gather' and attach deco mesh check out my deco mesh wreath tutorials.


When your done, stick a bow on the top, or a santa hat or perhaps any other tree topper you would like yo add.  also this is a view from the top with the lights on.


Full view of the tree with the lights on.


Or lights out if you prefer!


Saturday, November 9, 2013

A Roll Tide Burlap Christmas Wreath


In my attempt to make TWO of the exact same wreaths (because I have double doors) I wanted the project to be
 1) easier than making a deco-mesh wreath 
2) affordable since I need two of them.


I started with:
1) flat wood wreath frame
2) some pipe cleaners
3) and the burlap


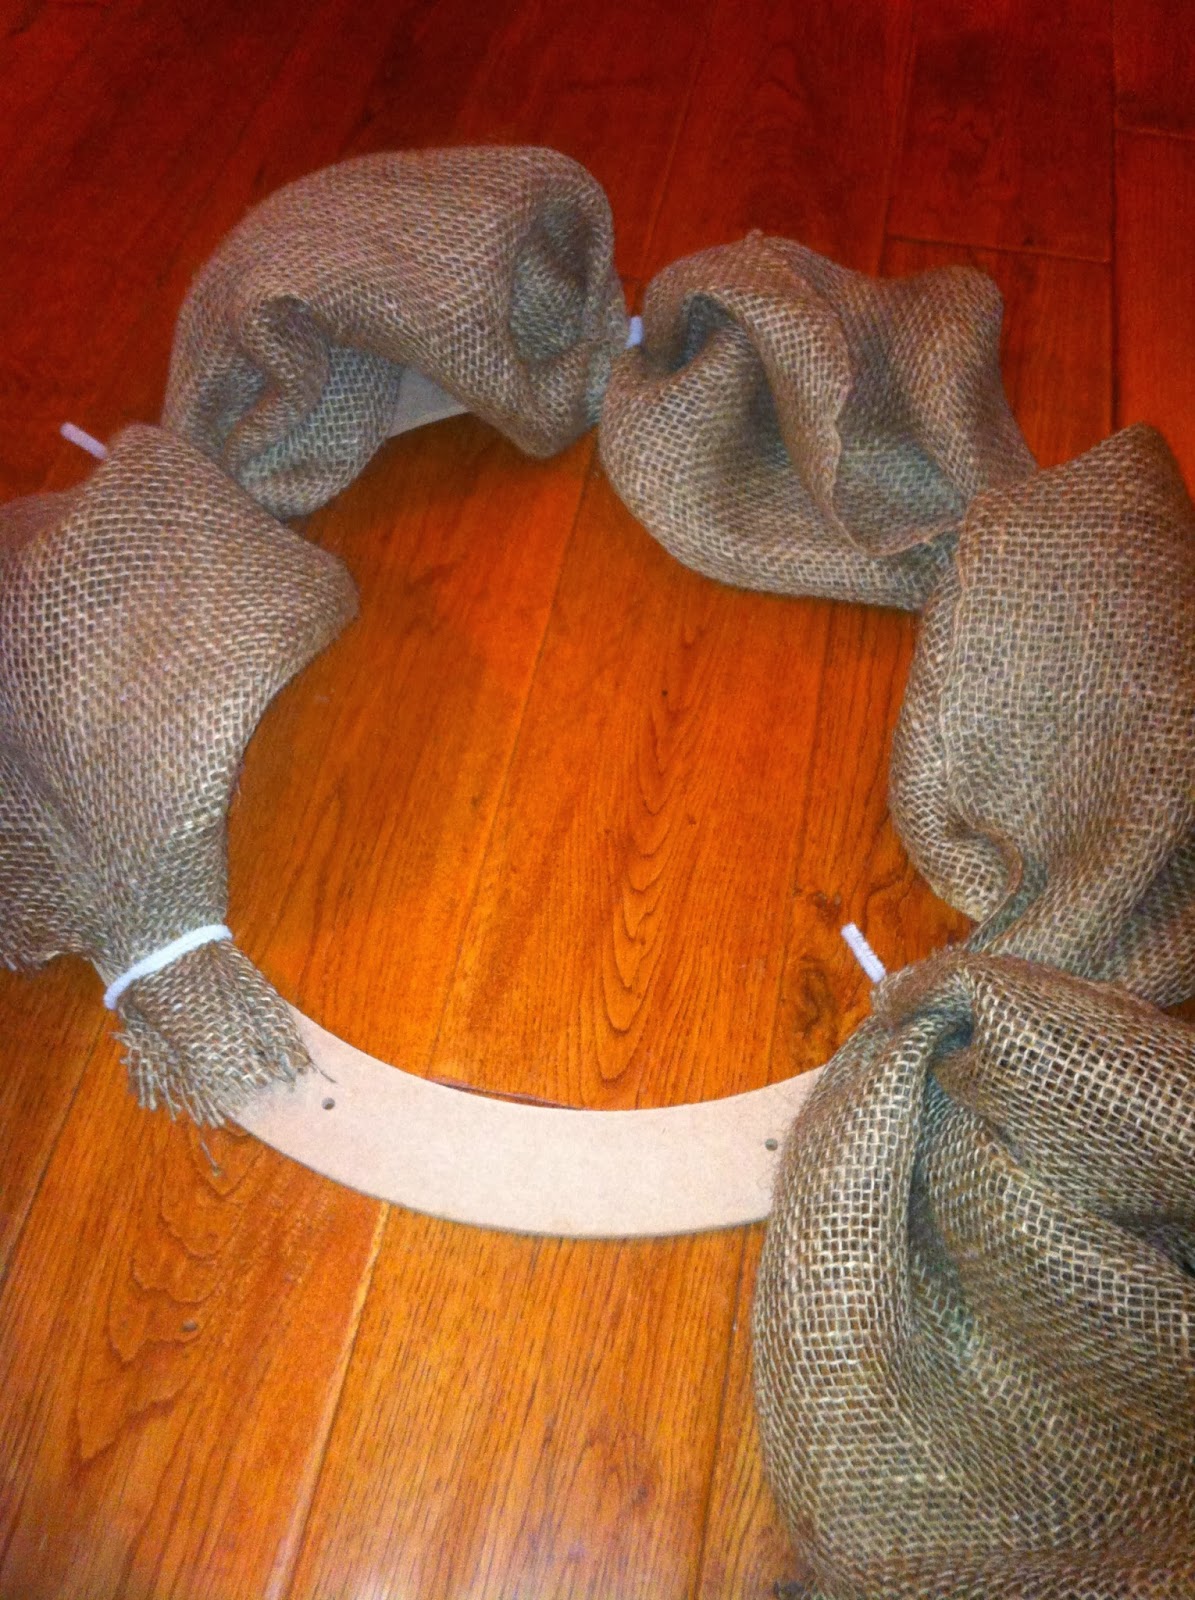
 Start by attaching one end of the burlap to your wreath frame with a pipe cleaner

 The picture on the left shows a view from the back once you've finished securing the burlap all the way around the wreath frame.--- Notice I tried to keep everything as evenly spaced as possible.


The picture to the right is a view from the front as I'm finishing up.---Again, notice how I tried to keep everything even.. the length of the burlap is the same for each "poof" that you see and all of the "poofs" are tied down with pipe cleaners the same length apart.


This is a finished view from the front…... along with a snapshot of my toes on the left for more amusement….


 Decide on the embellishments you want to add to your wreath.  I decided on this ensemble with some red, white and a bit of greenery.


I used a pipe cleaner and some hot glue to attach everything into one piece.


I added some houndstooth burlap bows… and there you have it!…. I call this my Roll Tide Burlap Christmas Wreath!


Notice each of my embellishments are attached to the areas of the wreath where there were pipe cleaners visible…. if you don't want to have to worry about covering over your pipe cleaners use a pipe cleaner that matches the color you are working with.


Friday, November 8, 2013

Deco-Mesh Wreath

Ahhh… more deco-mesh, It seems everyone these days is looking for a deco-mesh wreath or at least a tutorial on how to make one!  As I made this wreath I kept my blog in mind and decided to take plenty of pics so I could give a tutorial on how I made it!


I started with my basic supplies.  A wire wreath frame, some pipe cleaners and the red deco-mesh


Start by unrolling the deco-mesh.  The important thing to know here is that is that whatever LENGTH you unroll it to you will want to keep the SAME LENGTH from this point forward.


Here, I unrolled to the length I wanted and gathered the end of the deco-mesh.  Use a pipe cleaner (or floral wire)… or whatever you have, to secure the deco-mesh to the wire wreath frame.


I used the white pipe cleaners to secure the deco-mesh to the wreath frame so it would be easy to see how the process works for the purposes of this blog….. hopefully, it's helpful!


Unroll the same amount of deco-mesh as before.  Keep in mind… the more you unroll, the LARGER your "poof" will be… so, if you are looking for a smaller size wreath, start by unrolling a smaller length….

For this wreath, I opted for a "medium sized" wreath that would look "full."  You can tell from the picture to the left that the amount of deco-mesh I unrolled was practically the same as the length from the bottom of the wire frame to the top of the wire frame.

For this wreath, I used the wire wreath frame as a
"measurement guide" to measure a consistent length of deco-mesh for each "poof."


In this picture, I'm half-way finished!  You can see I'm tying the 'evenly measured' deco-mesh lengths onto the wreath frame in equal distances!

Because I prefer a "full" and "poofy" looking wreath, I am making the distance between each tied down piece of deco-mesh fairly close together.  


I am tying my deco-mesh down three times in between each section of the wire wreath frame.


And I'm using a pair of wire cutters to cut off the excess length of pipe cleaners! …. you do NOT have to do this… especially if you are using a pipe cleaner that matches the color of your wreath.  However, because I planned to blog about this wreath… I opted for these contrasting colors on purpose!!


View from the front!  I'm halfway through!!


I continued this technique all the way around the wire wreath frame.  Using wire cutters, I cut off all of the excess pipe cleaners… however, if you use a color that matches your wreath you don't even have to use a wire cutter to cut the ends of the pipe cleaners off.


A view from the front of the wreath… err.. ignore the junk in the background!


I added some white deco mesh to the center of the wreath using the same technique described above.  Also, you can see from the pic that its definitely NOT perfect!!


Once you have all the deco-mesh you want on your wreath frame….. decide on which embellishments you want to add.  Because I'm trying to make an Alabama "Roll Tide"/Christmas wreath I chose something that matched both…. and this is what I came up with…..


You can see from the picture to the left I added a hounds-tooth bow, along with some white poinsettia flowers along with one red flower that I positioned across the middle of the white deco-mesh.

Of course you could alternate colors and accessories to match whatever colors you are looking for in your wreath.


This is a picture from a distance…. you can see the white flowers, my houndstooth bow and the red flower across the center of the white deco-mesh.


This is a picture of the houndstooth bow up close…. I found some burlap ribbon with the houndstooth look and couldn't resist grabbing a few rolls!!

I used some hot-glue and a pipe cleaner to shape the bow and make it look like this in order to place it on the wreath.


This picture shows the white poinsettia flower up close so you can see what it looks like with the deco-mesh up close.


and here's the final picture from a distance!!  I think it turned out better than I expected!


It's a Merry Christmas "Roll Tide" wreath!!